Do you ever find yourself setting up a delay on a track in your mix, but it doesn’t sound in time with the song?
Or perhaps you’ve got your delay in time, but it just doesn’t sound that great… The luscious, spacious delay you’re after is getting masked by the rest of the tracks, or it just sounds a bit drab.
Delays are easy to implement, but much harder to master. The first step to delay mastery though, is to have the delay parameters explained so that you know exactly how to control your delays.
Some of these settings are self explanatory, others have more subtle effects, or take some playing around with, to really understand how they affect the audio. Before we go into the parameters though, let’s be clear on exactly what delay is…
What Is Delay?
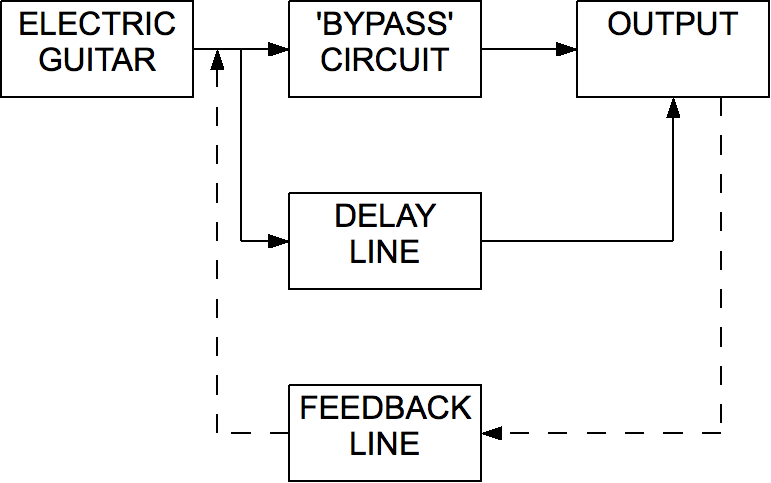
Delay is an effect that captures audio, and sends a copy of it to a loop. The audio is repeated, and each copy (tap) is blended with the original audio, creating an echo-like effect. The effect can give audio a feeling of being in a larger space, similarly to the effects of reverb. It can also be used to create interesting effects to make mixes more exciting.
The original delay units used tape to record the audio, which was then played back at intervals set by the user. This analogue type of delay was limited however, with the signal being degraded with each repetition.
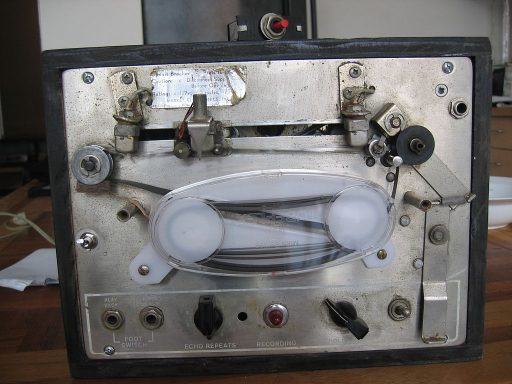
Modern, digital delays (DDL) allow for far more flexibility in their usage. They don’t rely on tape, and can duplicate audio indefinitely without any signal degradation. Digital delays come in the form of software plugins and hardware units.
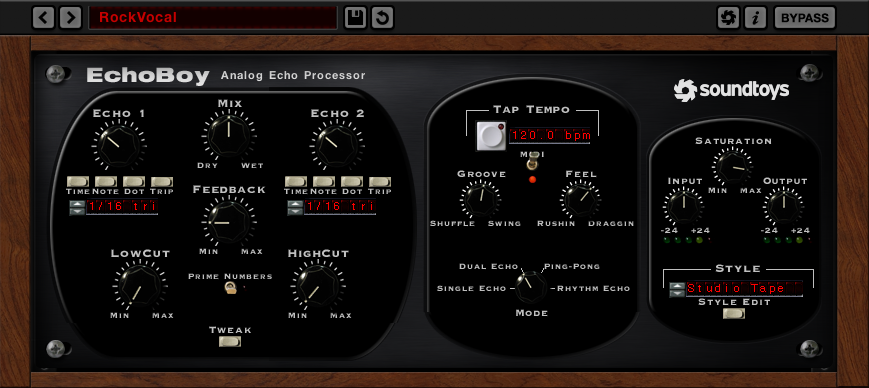
Now we can go over the parameters you’ll find on your delay plugin/unit so that you can craft your delays to your liking and achieve the effect that you’re after.
The Common Parameters
- Type/Mode – Changes the delay type.
- Delay/Time – The amount of time between each repetition/tap.
- Sync – Enable to sync the delay time to the BPM setting in your DAW.
- Feedback – How long the delay lasts for after the first tap.
- Mix – For adjusting the level of the delayed signal in relation to the original.
- Low/High Cut – Filters for cutting low or high frequencies from the delayed signal.
- Saturation – Applies analogue style harmonic saturation to digital delays.
- Modulation – Changes the tone of the delayed signal over time.
- Width – Widens the delay across the stereo field.
Delay Parameters Explained
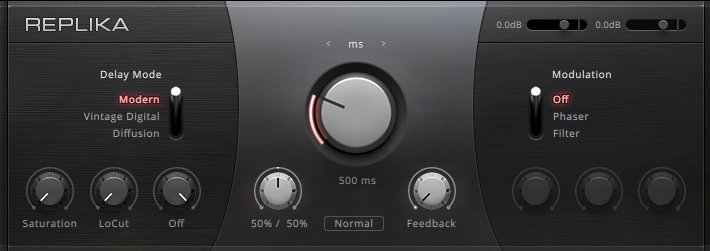
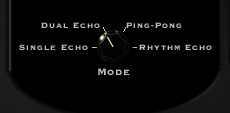
Type/Mode
Unless you’re using a delay plugin/unit that emulates a specific hardware model, you should have a few type options available. You’ll want to choose the delay type before you start changing the other settings. Here are the most common types –
- Digital (DDL) – A modern type of delay that creates exact replicas of the original signal. Digital delays can delay the signal indefinitely.
- Analogue – Before digital delay, there was analogue delay. Analogue delay tends to have some inherent signal saturation. This gives it a warmer and more ‘vintage’ tone. The signal is also degraded more and more with each repetition.
- Single – Creates one loop of repetitions.
- Dual/stereo – Creates two, separate loops of repetitions that can be panned differently from each other over the stereo field. Some delay units/plugins will allow you to completely change all of the parameters of the two loops independent of each other.
- Ping Pong – A type of stereo delay that gives the effect of the delay bouncing back and forth from one side of the stereo field to the other.
- Slapback – A very short delay repeated just once. This effect can be used to achieve a ‘50s style’ effect.
- Doubling – An extremely short delay that can give the impression that the source audio was recorded twice. This effect is especially apparent when used on just one side of the stereo field.
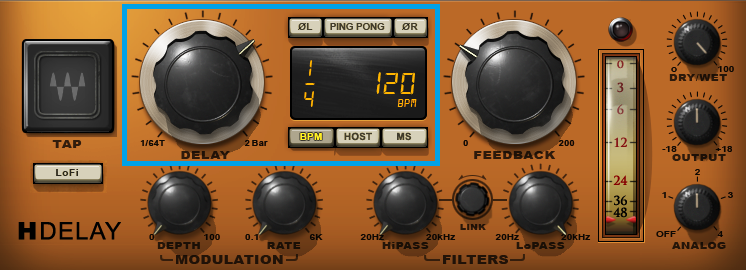
Delay/Time
One of the most important settings on a delay. It may be labelled as ‘delay’ or ‘time’ depending on the plugin/unit. However it’s been labelled though, it does the same thing – adjusts the amount of time between each repetition of the delay.
The setting is normally measured in one of two ways. The first is in milliseconds (ms), which sets a specific time in milliseconds between each delay. The second is in beats-per-minute (bpm), which enables you to set the delay to stay in time with a set tempo. The speed of the delay can be set to ¼ notes, ⅛ notes etc., based on the BPM setting. This is the easiest way of getting your delays to sound in time.
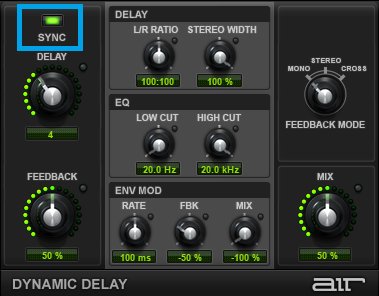
Sync
The sync switch is used in tandem with the delay/time setting. If you’re measuring the time in BPM, turning on sync will match the delay’s BPM setting with your DAW’s setting.
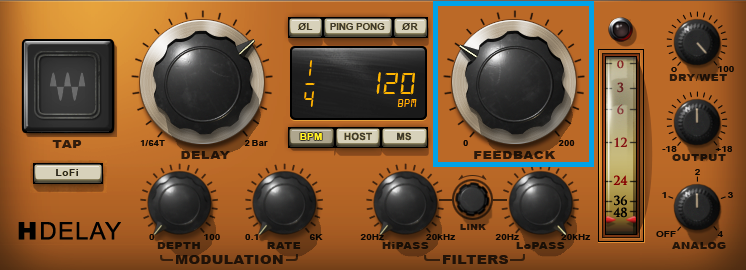
Feedback
Feedback is how long the delay will last for after the initial tap. It can be measured differently depending on the plugin. Some plugins will have a ‘min/max’ knob, others may measure the feedback time as a percentage.
On a digital delay, 100% or max will normally result in an endless delay loop, with min or 0% resulting in just one audible repetition.
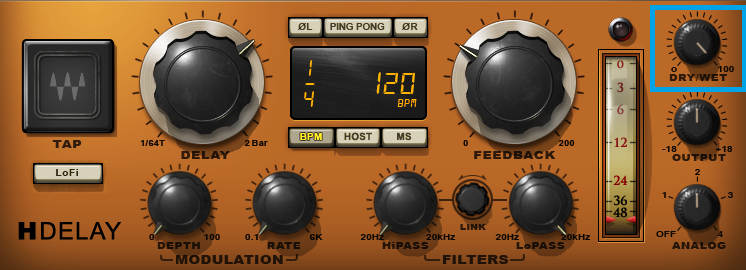
Mix
The mix control lets you dial in the level of delay that you can hear. You might see this labelled as ‘Dry/Wet’. The knob will normally go from 0% to 100%. If you’re applying the delay from a bus though (which you usually should be), you’ll want to leave this at 100% and adjust the mix using the send level.
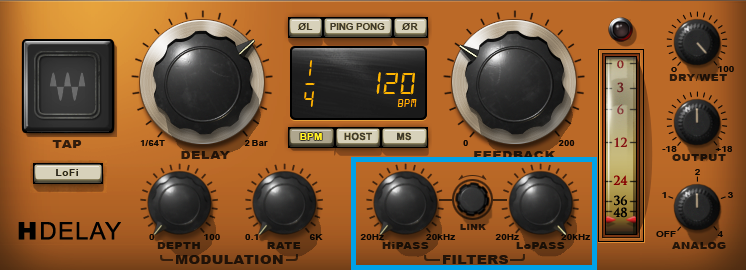
Low/High Cut
These filters let you reduce or cut high or low frequencies from the delays. This is great for giving a digital delay a more analogue feel (by reducing the top end) and also for differentiating the delays from the original signal.
Saturation
Some digital delays will have a saturation knob for dialling in harmonic distortion onto the delays. This gives the delay a vintage/analogue feel, while retaining the functionality of a digital delay.

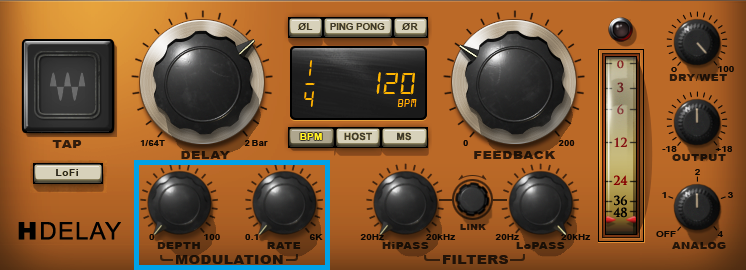
Modulation
While not found on every delay, modulation can make for some interesting tones. Modulation is when the audio signal is changed in some way (e.g. the pitch is changed or the audio is stretched) over time. This one is worth experimenting with if you want your delays to really stand out.
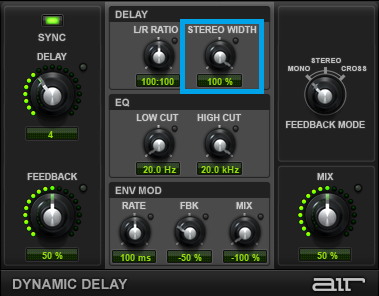
Width
The width control works with the various types of stereo delays, such as dual and ping pong delays. Dialing in width gives the delays a sense of being in a large space.
Now that you have had all of the main delay parameters explained, how will you be implementing delay in your mixes? Leave a comment below! And if you’d like any of them explained further, just drop a comment and I’d be happy to help.
This was a great article, very helpful. Thanks!
Happy to help, Jake!