Making your reverb sound “good” can mean different things to different mixers. Reverb is just one tool in a mix engineer or producer’s toolbox, but it’s one that’s used in almost every mix in all sorts of ways.
To me, I’d say a good sounding reverb is one that gives your music the right feel.
Are you going for a tight, modern and clean feel? A spacious, open and epic feel? You probably have that feel in mind already before you start applying reverb. How do you reach it, though? And how do you make sure that it fits right with the rest of the mix, without overpowering it or causing any other issues?
At every stage of the process there are choices you can make that will help to make your reverbs sound better. I’ve simplified things by putting together 6 steps that you can follow in order. In addition, you’ll find some common reverb issues with some tips on how to rectify them at the end of the guide.
Let’s go.
1. What Sound Are You Going For?
This is always going to be our starting point. Before you pick a reverb and start to move sliders, you should have at least a general idea of what kind of effect you’re after. I find that one of the easiest ways of doing this is to consider the physical space that the audio should sound like it’s sitting in.
In the digital domain, it’s easy to forget exactly what reverb is. Reverb is the echo effect that we hear when sound bounces around in a physical space, be that a small room, a large hall, or a deep cave. This is what you’re trying to emulate.

Think about the audio that you’re mixing – let’s say we’re setting up a vocal reverb. Now try to visualize where that vocalist is standing when they’re singing or speaking and imagine how that would sound.
Are they standing at the end of a long hall? Or would a small room sound be better suited? Do you have a particular reverb style in mind that you’d like to emulate, like a 60s style spring reverb? Or are you going for a very specific emulation of a certain real-life space? In which case a ‘convolution’ reverb might better suit.
Once you have a target sound in mind, it’ll make setting up your reverb much easier – that’s not to say you can’t experiment with it along the way though!
2. Picking a Plugin
Most reverb plugins, even stock ones, will give you some ready-to-go settings for emulating different spaces and reverb types. Take a look at D-Verb below that comes with Pro Tools –
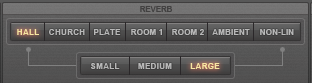
Choosing one of these based on your desired style can be a great place to start. If you’re aiming for an emulation of a very specific room type, you may need a choose a convolution reverb plugin. Don’t worry about perfecting the sound just yet though, now that you’ve selected a reverb plugin and a starting point, let’s hear what it sounds like.
3. Setting Up the Reverb
There are two main ways of setting up reverb for an audio track – you can either slap the plugin directly on the track as an insert, or you can put the reverb on an effects bus, and send the audio track to that bus (the bus is then routed to your master output). In most situations, the latter is the preferred option, and that’s the method we’ll be focusing on here. If you’re unsure of how to set this up in your DAW, find out here.
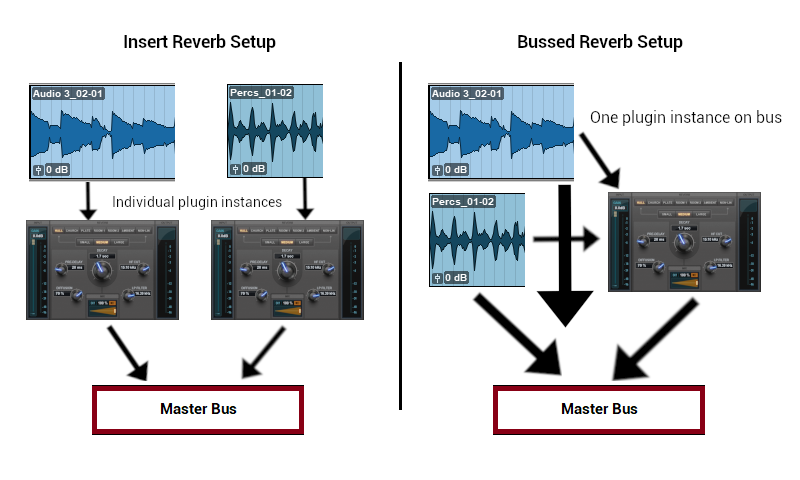
Using reverb on a bus rather than directly applying the reverb as an insert brings with it a host of benefits –
- You can send multiple tracks to that bus, enabling you to apply reverb to all of them with just one plugin. Not only does this save on processing power, it also makes for a more cohesive mix (more on that later) and allows you to make adjustments across the board via a single plugin instance.
- You’ll have a simple wet/dry control over each track. When you send each track to the reverb, you’ll be able to choose how much of the reverberated signal is heard in relation to the untreated signal. Simply slide the fader up and down. This gives you more control and makes for a more natural sounding reverb.
- You can mix the reverb itself. As the reverb plugin will be on a separate bus track, there’s nothing stopping you from adding more plugins to that track. This opens a whole host of mixing options, like applying EQ to just the reverb. More on this later.
Now that you have the reverb set up, hit the play button and see what it sounds like. It’s likely not going to sound perfect right off the bat, let’s make some adjustments…
4. Adjusting the Reverb
Having set up the reverb, get the track(s) playing on a loop and you can then start to make adjustments. But, before making any changes, make sure that you have a clear understanding of what each of the main functions of a reverb does.
Listening to the reverb, think about the ways in which it doesn’t sound right and make adjustments from there. You may find that you still can’t get the reverb sounding right by using the built in parameters. In this case, you can consider mixing the reverb bus itself.
Let’s find out how to do this, before we look at some common issues you might have with your reverb sound and how to fix them by adjusting parameters and mixing the bus.
5. Mix the Reverb Bus Itself
As mentioned above, having your reverb on a bus means that you can mix the effect alone. I can’t express how amazingly useful this is. Some reverb plugins do have EQs and other processors built in, but it might not be enough for every situation. Here are some reverb mixing tricks that can bring your reverbs to life –
- EQ the reverb – This may be something that you’ve already applied when adjusting the reverb plugin, but you might want to take it further. And besides, not all plugins have filters or EQ options built in. Placing an EQ plugin after the reverb on the bus will allow you to make large changes to the tonal quality of the reverb.
- Compress the reverb – The level of reverb will change depending on the shape of the reverb and the levels of audio going into it. Adding a compressor in the reverb chain can prevent it from getting out of control and masking the original audio.
- Add some harmonic excitement – Adding a distortion or other harmonic exciter plugin after the reverb can help the reverb to standout from the dry vocals.
- Sidechain compression from the vocals – Try sending the vocal signal (or other lead track) to a bus, and having that signal trigger a compressor on the reverb chain. This ensures that the reverb level is only ducked while the dry vocals are heard, and remains a feature during breaks in phrases.
6. Keep it Cohesive
Keeping the number of different reverbs in your mix low can really help to glue the mix together and prevent it from getting messy. As I mentioned before, once you have a plugin set up on a bus, you’ll be able to apply it to multiple tracks.
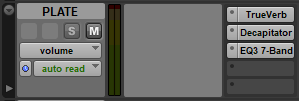
Personally, when mixing music I tend to start every mix with three reverbs bussed and ready. A plate reverb (which often ends up on the vocals), a warmer hall or chamber (which my drums and rhythm instruments normally make use of) and a long, less natural sounding reverb for experimenting with. How you make use of reverb is entirely up to you, though, and will vary from mix to mix.
Common Reverb Issues
It sounds too ‘big’ or too ‘small’
If it’s miles out, you might have chosen the wrong room type/style. Does your plugin have style settings? Try changing the room. If you like the general quality of the reverb, try adjusting the length/time, width, size and pre-delay. The higher you have these settings, the larger the room will sound.
You could also a apply a stereo widening plugin to the reverb bus if you still feel that it’s too ‘small’. In contrast, narrowing the width of the panning on your stereo reverb bus can tighten up the reverb and make it ‘smaller’.
It’s making the mix sound ‘muddy’
Firstly, make sure that you’re happy with how the original audio is mixed. A muddy source will result in a muddy reverb. Providing you’re happy with it, try applying a generous high pass filter to cut out the low end of just the reverb.
I can’t hear it with all the other tracks playing
Is the reverb fighting for the same frequencies as the original audio and the other tracks? Try applying a contrasting EQ to the reverb. Consider the panning too, is your mix quite narrow? A wide reverb could stand out more.
You could also use the vocal signal to trigger a compressor on the reverb chain using side-chaining. Once the reverb is compressed, increase the overall level of it using makeup gain on the compressor. This can be used to keep the reverb level tamed during vocal phrases, and bring the volume up during breaks in vocals.
The reverb doesn’t sound natural
Using bussed reverbs as opposed to an insert can make a huge difference as you’ll be able to easily blend the original audio with the reverberated audio – just like it would be in the real world.
Opting for reverb types that emulate real areas can help things to sound more natural – a drum room or church for example. Then have a think about what the emulated room should sound like. Are you going for a bright hall/church sound? A church would generally have a lot of hard surfaces, meaning the damping setting should be kept low in this situation.
Sound Off
Following these steps in order should help you to achieve that feel you’re after with your reverbs. One other piece of advise I’ll give is that less is more (usually). Listening back to some of my first ever mixes from college is tragic. They’re saturated with reverb and don’t put across the right feel at all. Once I started to go more subtle, my reverbs started to sound a lot cleaner and more professional.
If you’re struggling with anything in particular with your reverb sound that hasn’t been covered here. Please leave a comment below and I’d be happy to help.
When I increase the reverb level on my digitech live 5 I can’t hear any change. Using a new ev 50 pa on the live setting