Automation tends to be one of the final things that I focus on in a mix. But it’s essential, and also one of the most fun!
Automation lets you change how a plugin affects the audio at different points in the track. You can draw in automation points on most good DAWs and link them to level, pan and plugin parameters to improve balance and create excitement in the mix. Once the automation points have been drawn in, your DAW will automatically change the settings during playback.
If you’re wondering how you can use automation to improve your mixes, here are some of my favourite automation mixing tips for you to try.
1. Widen the Stereo Field for Choruses
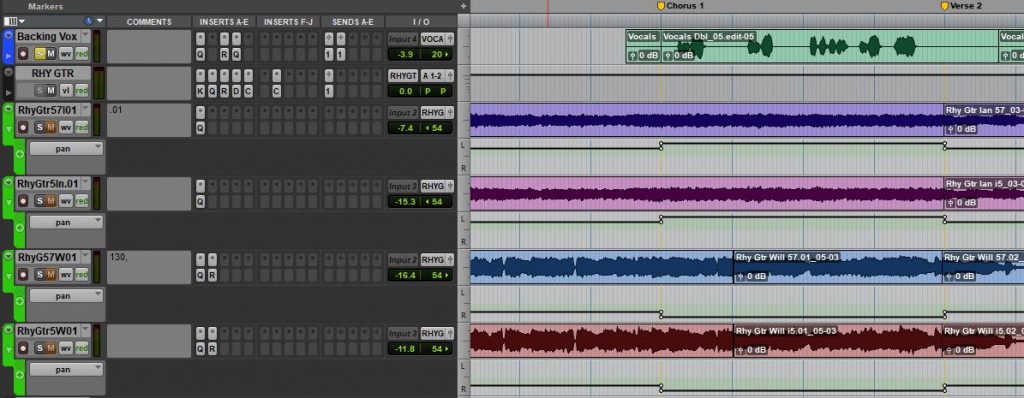
Choruses/hooks need a little something to help them to stand out from the other sections. Or a few “little somethings”, ideally. One technique that I employ regularly is to widen the panning of certain tracks, only on the choruses. It opens up the mix, making it seem ‘larger’. It can also help to make room for any additional tracks that might only be heard in the choruses. This works especially well on doubled up rhythm tracks and drum overheads.
To do this, simply open up the automation lane for the tracks that you want to widen, and automate the panning value just for the chorus sections. For example, if you have two rhythm guitar tracks that are panned 50 left and 50 right respectively, pan them at around 90 left and 90 right just for the choruses. It works wonders!
2. Automate Reverb and Delay Levels
Heavy use of reverbs and delays in busy sections can make for a muddy mix. In quieter parts of a mix, though, your luscious analogue delay can have it’s time to shine.
Try increasing the mix or feedback level of your delays in breaks in vocals or lead instruments. It can help to bridge the gap between phrases and can give the mix a more ambient feel without making it muddier. This technique can also work well at the end of the song, by increasing the amount of delay on the very last word or note.

3. Increase Mix Bus Volume for Choruses
This is another one of the automation mixing tips that’ll help your choruses to pop. If you make use of mix busses in your mixing sessions (which you should), you’ll be able to make changes to the entire mix from just one automation lane. Increasing the level of the mix bus, only at the choruses, helps your choruses to standout from other sections. This kind of technique is especially useful in pop music.
Here’s how it works. You send all of your tracks and instrumental busses to the mix bus. Once this is set up, set the automation parameter on the mix bus to level or volume and drag it up only at the choruses.
I recommend starting with subtle changes (around half a decibel) for mix bus automation as the effect will be much more noticeable with all tracks being affected.

4. Fade Outs with Automation
Using the clip fade function in your DAW on each clip will allow you to create a fade out with relative ease. For a quicker method, automate a gradual volume decrease on the mix bus, which will affect all tracks at once. This also lets you quickly make changes to the fade out as you won’t need to change every track. It may help to use a MIDI controller and record this in with a fader, for a smoother fade-out. Fade-ins can also be used to build up to sections to create excitement.

5. Bypass Plugins for Different Sections
Some parts of your song may need plugins that aren’t needed elsewhere. For example, a phase plugin for a drum fill (e.g. the drum fill at 5:10 in Messiah by Dave Kilminster). Rather than duplicating all of the drum tracks, set the automation on the drum bus to control the bypass parameter on the phase plugin. This means the phase effect will kick in automatically, only when needed.
6. Automate Harmonic Saturation
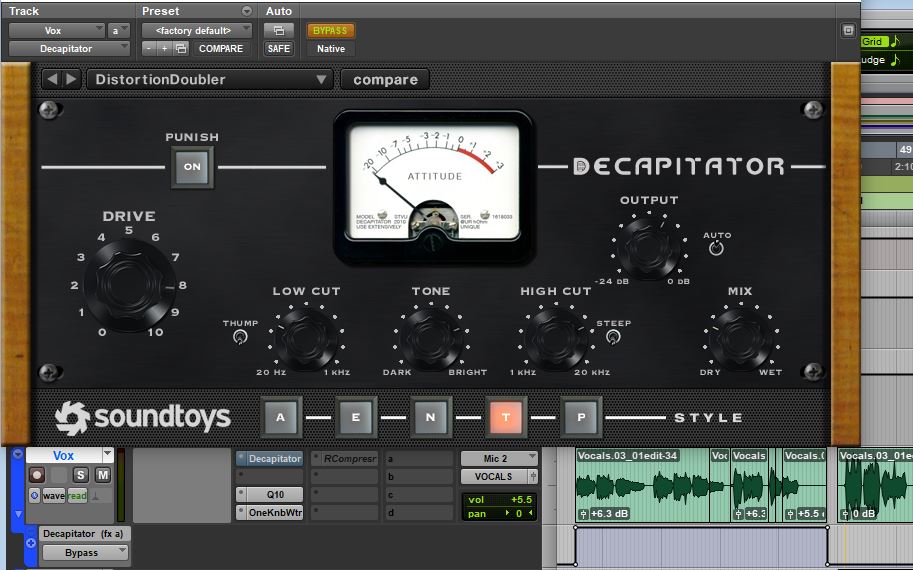
Harmonic saturation can give warmth and presence to your mix, and help to “glue” everything together. Certain tracks may benefit from having different levels of saturation at different points in the song.
For example, you may have a clean guitar and vocal section introducing the song. For the intro, you could keep the level of harmonic saturation low, and then automate the mix knob to increase the amount of saturation when the full band kicks in. This can increase the contrast between a quiet, solo intro and the bombastic sound of the full band.
7. EQ Frequency Sweeps
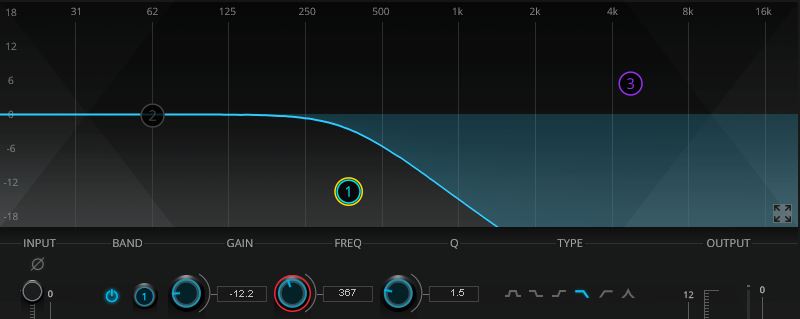
This technique is super popular in electronic/dance music and can be used for building up to a section or for revealing certain instruments in an exciting way.
Simply create a low pass filter that starts somewhere in the low-end or low-mids. Set the frequency control as a parameter for automation and draw an automation curve that slowly increases the frequency over time. You’ll hear that the track gradually reveals itself with a cool, phase effect. Experiment with different frequencies and speeds!
8. Transitioning Between Two Tracks
This is one of my favourite tricks, but it’s not commonly used. With clever use of EQ and level automation, you can give the listener the impression that one piece of audio is ‘transforming’ into another. Have a listen to Sheep by Pink Floyd from 2:10 to 2:20. The word “air” sounds like it’s transforming into the synth!
Automation could be used to achieve this effect by fading out the first track while fading in the second track. In addition, a phaser or distortion plugin could be slowly applied to the first track using automation, so that it gradually takes on a similar timbre to the second track.
It can be a tricky one to pull off, but if you can manage it, your mix could really stand out from the crowd!
Which of these automation mixing tips are your favourite? Or maybe you have one of your own? Share in the comments below!